Hosting Gatsby Project on Heroku
Last Updated: 23 December 2021
Introduction
This will explain how to deploy a static GatsbyJS site on Heroku, including setting up a staging and production environment and connecting to GitHub to enable continuous deployment.
Prerequisite
Step 1 - Create a Gatsby project
Create a new Gatsby project if you don't already have one.
gatsby new test-project https://github.com/gatsbyjs/gatsby-starter-hello-world
Step 2 - Set up a git repo
- Log into Github and create a new repo.
- Initialize a git repo in your Gatsby project directory then commit and push the changes to GitHub.
git init
git add .
git commit -m "first commit"
git branch -M main
git remote add origin <remoteURL>
git push -u origin main
Step 3 - Set up Heroku
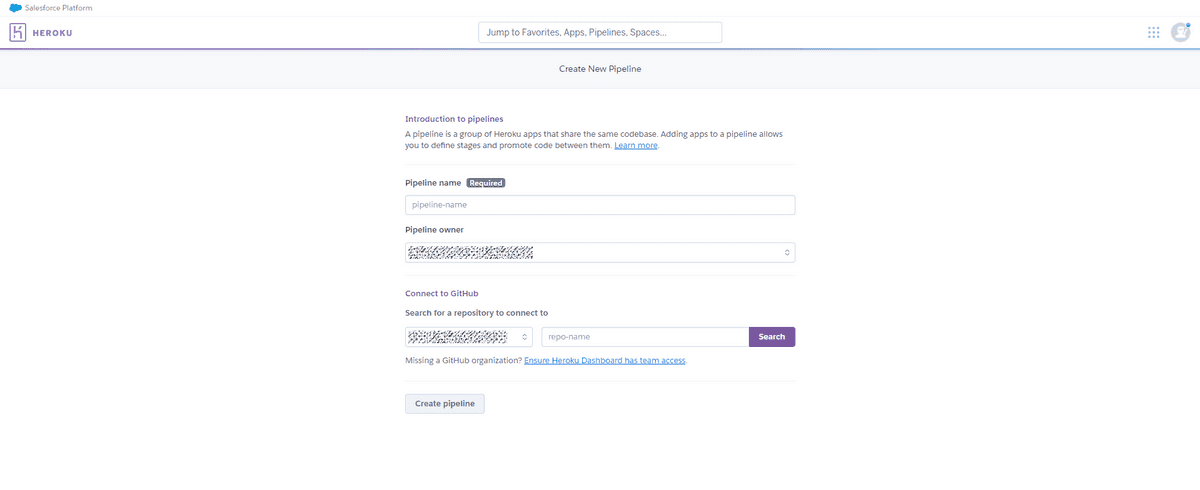
- Go to your Heroku dashboard and create a new pipeline.
- Connect it with your Github repo and create the pipeline
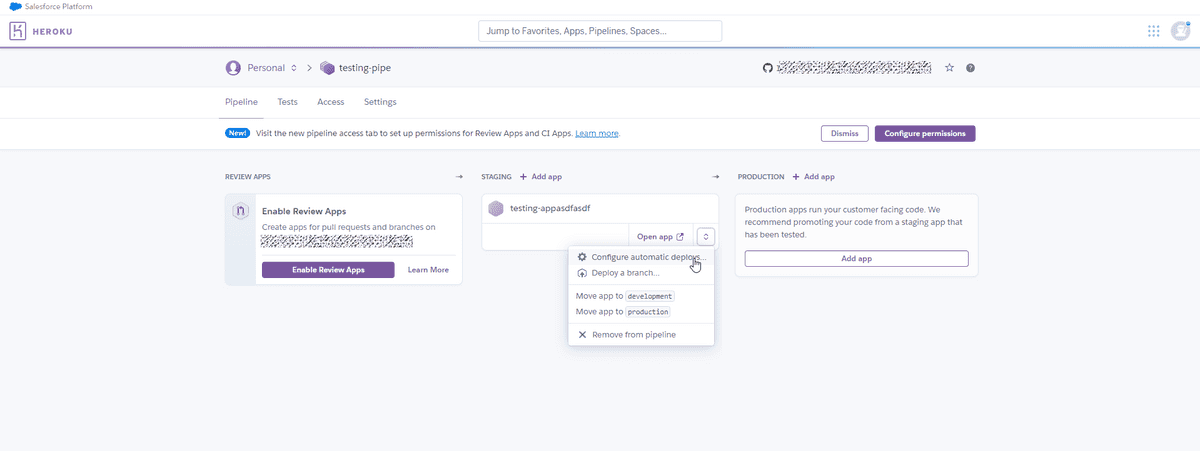
- Within the pipeline, add apps for staging and production.
- Enable automatic deployments from the master branch for the staging app.
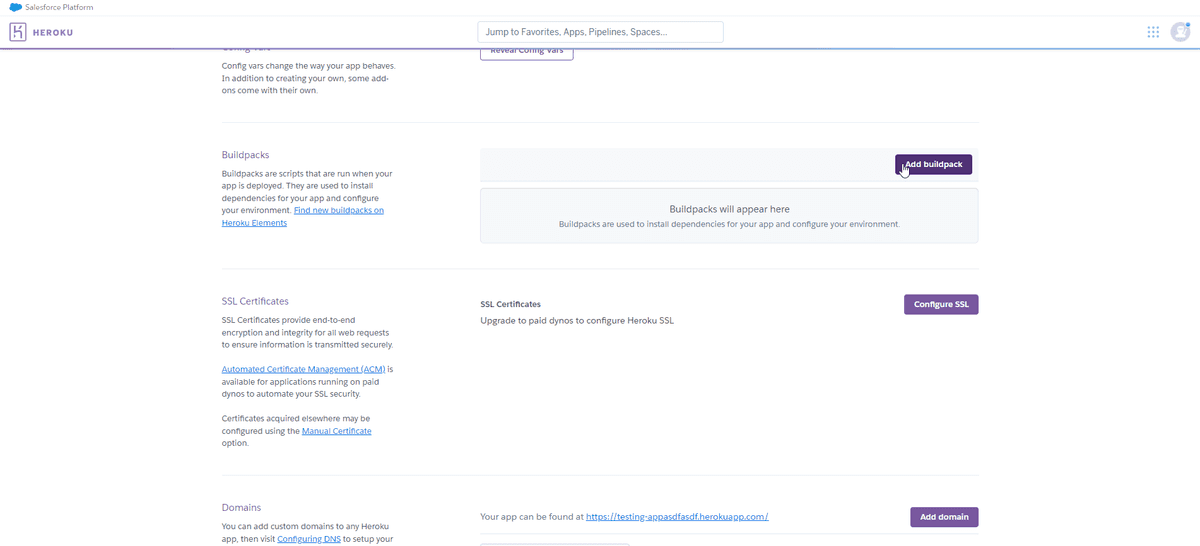
- Go to the settings of each app and set the buildpacks. These scripts run when your app is deployed.
Add these lines to the buildpacks:
heroku/nodejs
https://github.com/heroku/heroku-buildpack-static
Step 4 - Prepare your Gatsby project for Heroku deployment
- Add a build script in your
package.jsonfile. This will let Heroku know to build the Gatsby project.
{
    scripts: {
         "heroku-postbuild": "gatsby build"
    },
}
- Create a file called
app.jsonin the root directory of your project to hold general information required to run an app on Heroku. Add the two buildpacks:
{
    "buildpacks": [
     { "url": "heroku/nodejs" },
     { "url": "https://github.com/heroku/heroku-buildpack-static" }
    ]
}
- Create a file called
static.jsonin the root directory for the configuration of the static buildpack. You can view more configuration options here. In this case, we only define the folder of our built application:
{
    "root": "public/"
}
- IMPORTANT - Heroku's deployment will fail when you have both
package-lock.jsonandyarn.lockin your project directory. So make sure you only have one. For example, delete thepackage-lock.jsonfile in the case you are using yarn and vice versa.
Step 5 - Test your setup
You can now test your setup by committing the changes from the last step to Github:
git add .
git commit -m "Heroku deployment"
git push origin main
This is should trigger an automatic build and deployment of your Gatsby project to the staging environment. You can then review the staging app and promote it to your production website if you wish.


